WordPress integration
In short
You connect Scriberry to your WordPress site once — from then on every approved post appears on the blog by itself, on the date you scheduled. You don't need to log into WordPress, copy content over, or remember the schedule.
The whole setup boils down to three things: create the integration in Scriberry, install our plugin on your WordPress site, paste one key so both sides recognize each other. A few minutes total.
What you need
- A WordPress site where you have administrator access (so you can install plugins).
- Our plugin —
scriberry-wp(link in Step 2). - An active Scriberry project you want to connect the site to.
Step 1. Create the integration in Scriberry
- Open your project → Integrations tab.
- Click the WordPress tile.

- Give the integration a name you'll recognize later (e.g.
Company blog — production). Click Create.
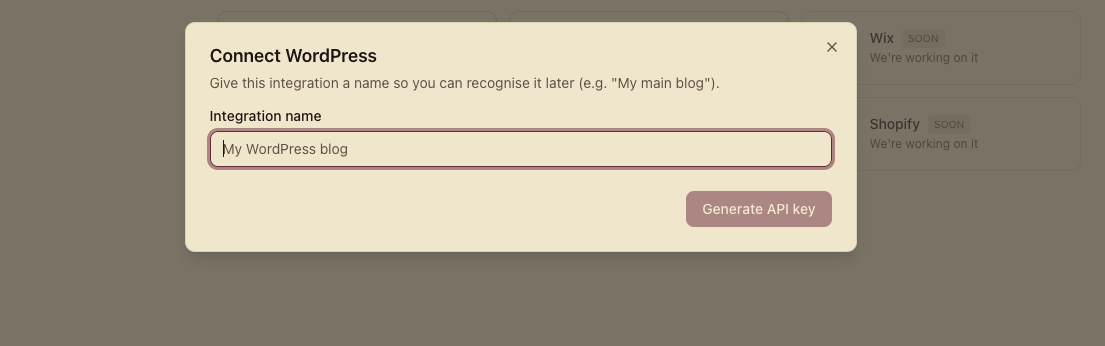
- Scriberry generates an access key and shows it next to a Copy button. Copy it right away — you'll need it in WordPress in a moment.
The key is shown only once
Once you close this screen we won't show it again — even we don't know it. If you lose it, use Generate new credentials on the integration card to get a fresh one (the previous one stops working immediately).
- The integration appears in the list with the status Awaiting connection — waiting for the WordPress plugin to reach out to us.
Step 2. Install the Scriberry plugin on your site
- Download the plugin: .
📸 TODO (screenshot): the plugin download page with the Download button highlighted.
- In your WordPress admin go to Plugins → Add New → Upload Plugin, choose the downloaded ZIP file and click Install Now.

- Click Activate.
Step 3. Connect the plugin to your Scriberry project
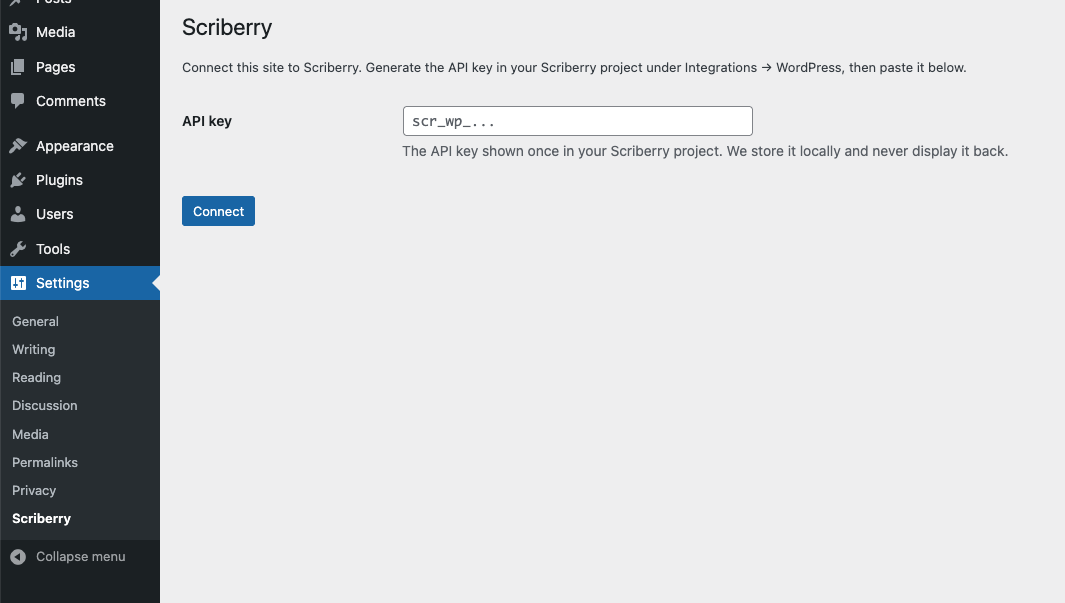
- In WordPress admin open Settings → Scriberry.
- Paste the access key you copied in Step 1 and click Save.
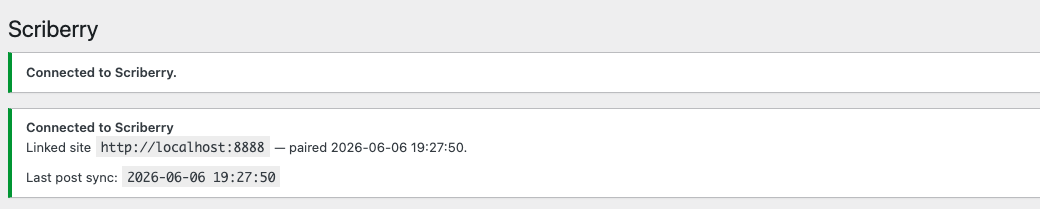
- After a moment the integration card in Scriberry switches from Awaiting connection to Active. That's it. From now on the plugin will publish approved posts on its own.
Mapping topics to WordPress categories
Scriberry organizes a project's content into topics (for example "Personal finance", "Investing", "Saving"). The WordPress plugin lets you choose which WordPress category each topic should publish into.
You set this in the plugin's settings, not in Scriberry — there you pick one category per topic from drop-down lists.
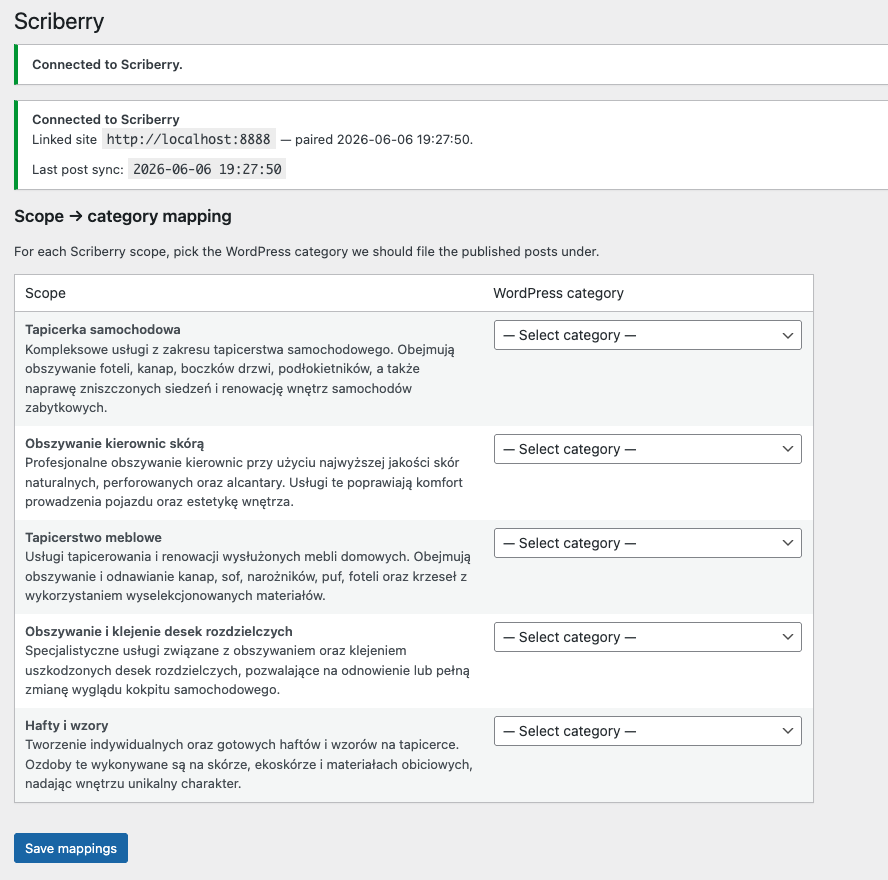
If a topic doesn't have a category mapped, the post will still publish — it lands in your WordPress default category.
Tags picked automatically
Before a post leaves Scriberry, we check the list of tags that already exist on your blog and pick the ones that best fit the post's title and excerpt. That way we never invent tags from scratch — we work from your own vocabulary.
- We pick 3–7 tags maximum, strictly from what you already use.
- If your blog doesn't have any tags yet, the post publishes with none — we'd rather not guess.
What happens at publish time
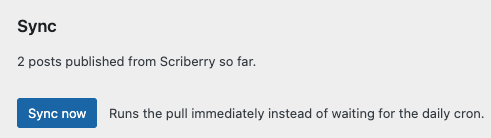
Once a day (and on demand from the plugin's UI) the plugin asks Scriberry whether there are new posts to publish. If there are — it downloads them with their images and publishes them on the blog right away, in the mapped category, with the chosen tags and the featured image set. Once done, it updates the published-post counter and the last-sync timestamp in Scriberry.
If something doesn't work
- Status stuck on "Awaiting connection" — the plugin hasn't reached us yet. Make sure the key was saved in the plugin settings and that your WordPress site has internet access (corporate firewalls sometimes block this).
- Status "Error" — the integration card will show what went wrong. Common causes: a topic with no category mapped, the plugin blocked from reaching our server, the key changed on only one side.
- You want to rotate the key — open the three-dot menu and pick Generate new credentials. Remember to paste the new key into the plugin settings immediately — the old one stops working right away.
- You want to pause publishing without losing settings — from the same menu pick Pause. Posts will still be approved in Scriberry, but they won't reach the blog until you pick Resume.